
Contents
How to Prepare an Image for Cropping in Illustrator
Whether you want to crop image in Illustrator or any other design application, planning to implement is essential.

“You can use the Artboard for this purpose—just use the Artboard Tool (Shift-O) to resize the artboard area and create visible boundaries. You can then adjust any cropping in Illustrator to this area.” – Envato Tuts
How to crop an image in Adobe Illustrator
Method 1: Crop image in Illustrator using Artboard
With the image cropping tool in Illustrator, you can cut the workspace along with all the objects within it. The method above works well for simple vector images.
Before starting to crop an image in Illustrator using the Artboard, it’s advisable to save your artwork in one of the formats – EPS, AI.
To remove a portion of the image, select the Artboard in the Toolbar. Its icon looks like a square with small lines extending from the corners. You can also use the shortcut Shift + O.
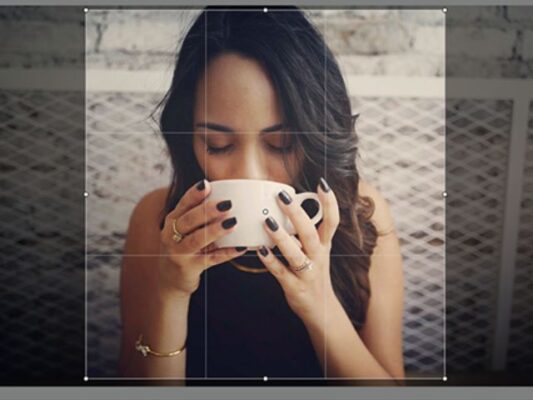
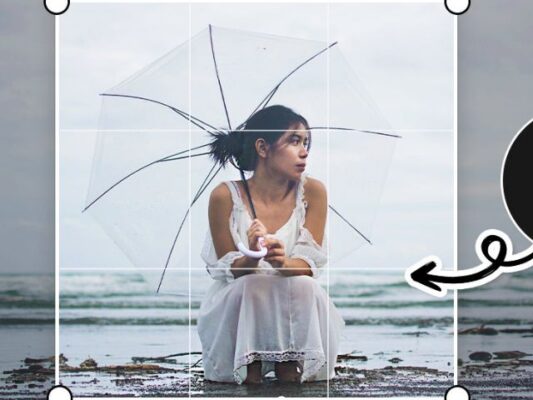
A dotted line forms along the edge of the image. Drag it to resize.
Press Enter to apply the changes. If there’s a mistake, you can undo it with the Ctrl + Z shortcut.
Use the Rectangle Tool to draw a rectangle matching the Artboard’s size.
Press Ctrl + A to select all objects.
Left-click and choose Make Clipping Mask.
The file can be saved in Illustrator format if you want to edit it later. If you intend to upload it, save it in JPG or PNG format. To do this, click on “File,” select “Save for Web” or “Export” from the menu. When saving, choose the desired format; PNG is for original quality with a transparent background, while JPG/JPEG does not support transparency.
It’s important to understand that this Illustrator cropping method is suitable only for simple projects, cutting a corner of the image.
Method 2: Cropping Images in Illustrator using Pathfinder
Cropping images in Illustrator using Pathfinder is somewhat more intricate than the previous method. Let’s assume you need to cut a corner from a square, and the cutting edge needs to be rounded.
- First, draw a square using the appropriate tool.
- Place a circle on top of the square. The circle should be positioned at the corner you intend to remove. The circle’s border can snugly fit to the center of the square (Illustrator will snap to the center of the square when it touches the circle’s border).
- If necessary, both the circle and square can be freely transformed. To do this, in the “Toolbar,” select the black arrow and click on either shape or hold down the Shift key on both – in this case, both will be selected. Then, adjust the shapes along the border. To maintain proportion while dragging, hold down the Shift key.
- If the circle is below the square, bring it to the front by right-clicking on the circle > Arrange > Bring to Front.
- Now, select both shapes and switch to the Pathfinder Tool in Illustrator. You can find it in the panel on the right. If it’s not there, click on “Window” > “Pathfinder.” You can also use the search feature located in the top right corner of the window.
- In “Pathfinder,” under Shape Modes, click on the second icon (Minus Front).
- Using this method, you can handle images with medium complexity. Additionally, the workspace is not reduced, and after cropping, you can continue working with the object without limitations.
This technique allows for more intricate image manipulations while maintaining flexibility in the working area.
Method 3: Using Clipping Mask to Crop Images in Illustrator
We will also explore the method of cropping images using the Clipping Mask in Illustrator with an example of a circle and a square, this time cutting off ¾ of the circle’s area.
- Draw a square and a circle on it.
- Adjust the size and position of the shapes so that the area to be cropped fits your expectations as closely as possible.
- Select both shapes and go to the “Object” tab in the top menu. Look for “Clipping Mask” there, in the drop-down menu, click on “Make.” To simplify the entire process, just select both shapes and use the shortcut Ctrl + 7.
- After applying the clipping mask, the image is still preserved, and the outline disappears. The object of the cropped image becomes invisible but is not deleted.
- The mask can be adjusted. For example, move it in any direction, enlarge, or reduce it. Meanwhile, the images saved beneath it remain undistorted.
- To remove the clipping mask, you can use the shortcut Ctrl + Z. If that doesn’t work, go to the “Object” menu. There, expand the “Clipping Mask” submenu and select “Release.”

This method is applicable to more complex images. It is also a preferred way of cropping images in Illustrator among professional designers.
Method 4: Cropping Images in Illustrator with Opacity Mask
Similar to the initial steps from the previous method, you need to draw a square and a circle (in your case, these could be different shapes; the method is being discussed using these examples). Draw these shapes so that the circle overlaps the square.
- Color the circle with a black and white gradient.
- The gradient direction can be changed using the Gradient Tool in the Toolbar.
- Select both shapes and create a transparent mask. To do this, in the “Windows” tab, find “Transparency,” and select “Make Mask.”
- You can also adjust the transparency of the shape in the “Opacity” section.
This method allows for precise and creative cropping using opacity masks in Illustrator.
Note
“The Crop Image feature works only on the currently selected image. Also, linked images become embedded after you crop them. The cropped portion of the image is discarded and is not recoverable. Also, you cannot transform an image while cropping it. If you try to transform an image after selecting the Crop Image option, Illustrator exits the cropping interface.” – Adobe
“Pro tip – select the Rasterino Panel’s flyout menu entry Crop Image Tool Options to tweak the way you want to work.” – Astute Graphics
Related Posts